To set up custom sort order logic, you must have a column with a numeric value. If this column is not available in the data source, it must be created manually.
This Knowledge Base contains articles that explain how to set up a custom sort order logic. This article shows how to sort by month, and this one shows how to sort a hierarchy. In all cases, you must have a column with the numeric value to sort by.
If your source system is Excel, then it is easy just to add a column that indicates the sort order. But you might be loading from a system that doesn’t include the sort order, and it would be too complicated to add it. Of course, we have a solution for this case. Let’s see how you can manually add the sort order column.
Let’s assume we want to sort a Continent/Country hierarchy in a specific way, but no sorting columns are available. This is our “Regions” dimension table:
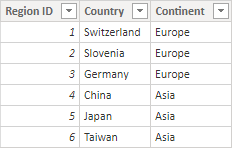
By default, sorting a text column will result in the alphabetical order, and below is the (non-alphabetical) order we would like to get when the fields are added to the visual:
Europe
Switzerland
Germany
Slovenia
Asia
Japan
China
Taiwan
Add a sorting table
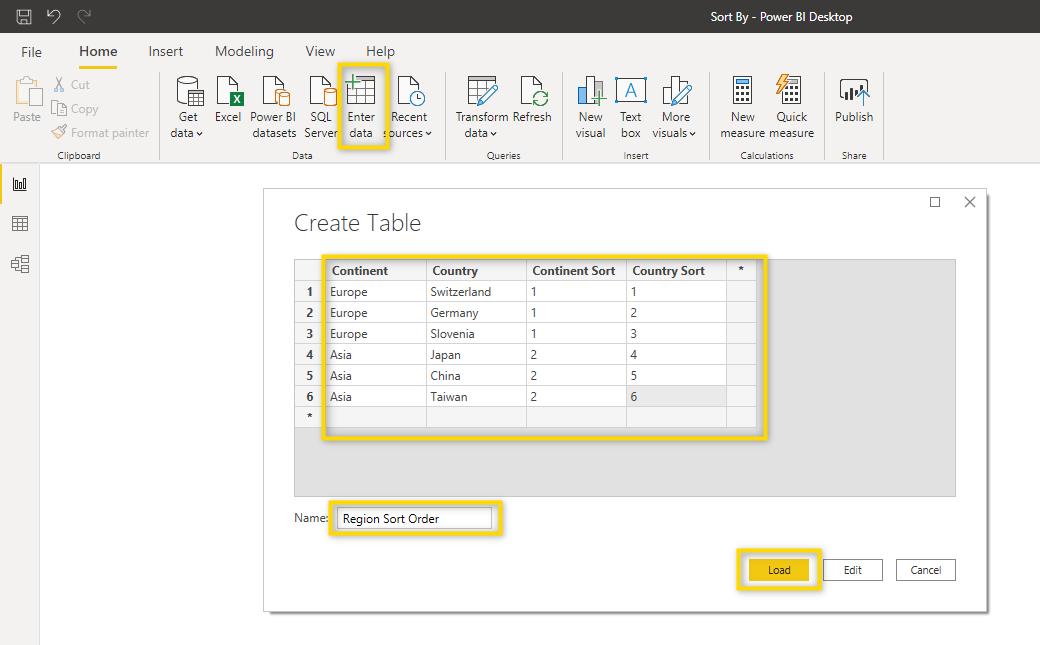
First of all, let’s create a new table that will contain the custom sort order. To create a new manual table, select Enter data, fill out the table, give it a name, and click Load. You might as well create this table in Excel and load it into the data model.
Create a relationship
Afterward, we need to go to Model view to create a relationship between the new table “Region Sort Order” and the original table “Regions“, with direction toward Regions and cardinality Many to one.

Create calculated columns
Now, we can return to the Table view, select the “Regions” table, and click on New column. We will create a calculated column with DAX to bring the sort order information to the original table. Let’s call this new column Country Sort Order, and we’ll use the RELATED function for the calculation

Country Sort Order =
RELATED('Region Sort Order'[Country Sort])
The RELATED function requires a relationship between the current table and the table containing the related data. You specify the column with the desired data, and the function uses an existing many-to-one relationship to retrieve the value from that column in the related table. If no relationship exists, you will need to create one.
When you press enter, an additional column will appear.

We repeat the same process for the Continent Sort Order.
Since the manually created table did its job, we don’t need it in the report view, so you should make sure it’s not shown there. To do this, right-click on the table and select “Hide in report view“

Apply “Sort by column”
We can now apply the sorting of Countries and Continents based on the sort order columns. Select the “Country” column, click on the Sort by column at the top ribbon, and select the “Country sort order” column.

Repeat the step on the “Continent” column, and then we can go to the Report view and place both Continent and Country in a Zebra BI Tables visual. Add any value column, and the visual will at first be sorted by value as demonstrated below:

Click the AC header twice to get the custom sort order in place.


An alternative to adding the sorting rows in Power BI Desktop using DAX, you could also use Power Query Editor. Click here to learn more about the merge function in Power Query.
Conclusion
In summary, setting up a custom sort order in Power BI requires a numeric sort column, which might need to be created manually if not present in the data source. Whether using DAX or Power Query, these methods ensure your data is sorted according to your specific needs, enhancing the clarity and effectiveness of your reports.