Zebra BI Tables is by far the most powerful table/matrix visual in Power BI, and with it, you can build extremely flexible tables with embedded charts. Besides reordering columns, doing a P&L calculation, and top N analysis, the visual offers a range of options for sorting. For best experience, you are welcome to start a free trial of Zebra BI for Power BI first.
One-click sort by any column
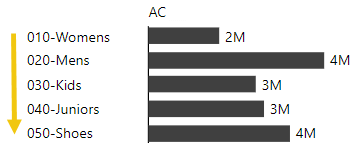
The Zebra BI Tables visual allows designers and viewers alike, to quickly sort by any column in the visual by simply clicking on the column header. This toggles the sort on the selected column between (1) descending, (2) ascending and (3) custom sort, respectively. If sort by column is enabled (ascending or descending), then a small up or down arrow is displayed next to the sorted column header:
Sort by category (alphabetical or custom sort)
In certain situations, you need to set a custom sort order. For example:
- Sorting accounts in an income statement,
- Sorting business units or regions by your specific/standard order,
- and many others…
In this case, first make sure that you have set the sort by column in the Zebra BI visual to custom order (click one or two times on a column header until there are no up or down arrows beside the column names):

If your category data field is already correctly sorted in your Power BI model (Modeling > Sort by Column), then you will automatically get the right order of categories:
If you did not get the desired sort order, then you can set it in the Ellipsis (…) menu on the visual:
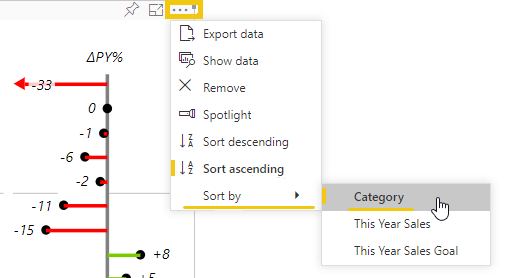
As shown in the above picture, you can select any data field from the Sort by menu and choose Ascending or Descending order.
Best practice: Custom sort in Power BI model
Power BI will sort all category (text) fields alphabetically unless you specify a custom sort for a selected data field in your Power BI model.
As a best practice approach, we strongly recommend you to set up a custom sort order for any data fields that require a specific order of elements. The most typical example is the order of accounts in your income statement, but this is also recommended for other text fields such as regions, business units, product groups, etc.
To set up a custom sort order in your Power BI model, you need to:
- Import an additional “sorting” column (e.g. Account ID, Business Unit ID, Account order, etc.) into your Power BI model.
- Set the sort order for your data field to the new sorting column.
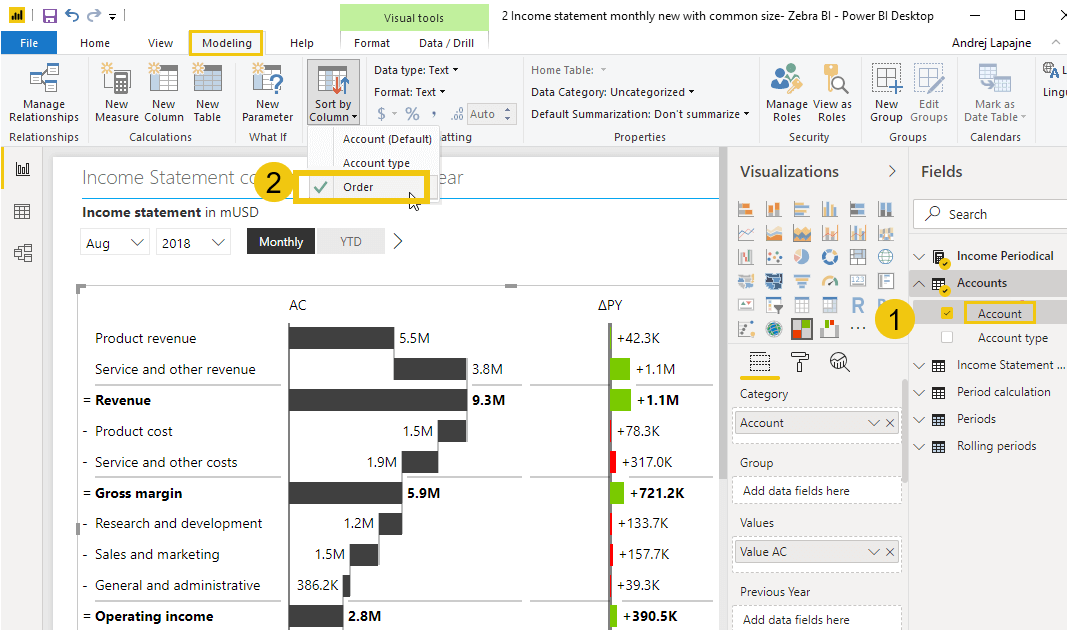
To set the sort order, select your data field in Power BI, then click on Modeling > Sort by column and select the appropriate sorting data field from the menu. In the following screenshot, we have set the sort order on the “Account” field to the sorting field called “Order”.
And that’s it. As you can see sorting in as little as one click and we’re confident you’ll soon manage to sort without much thought. If you are not the Zebra BI for Power BI user yet, you will have the best experience, if you start a free trial.
Read more about setting up a custom sort order logic. Besides custom sorting, you can also add your own custom columns into the visual. →