To unlock the full functionality of Zebra BI visuals for Power BI, you need to enter a license key to activate a paid version based on our pricing plans.
Import Zebra BI visuals from AppSource
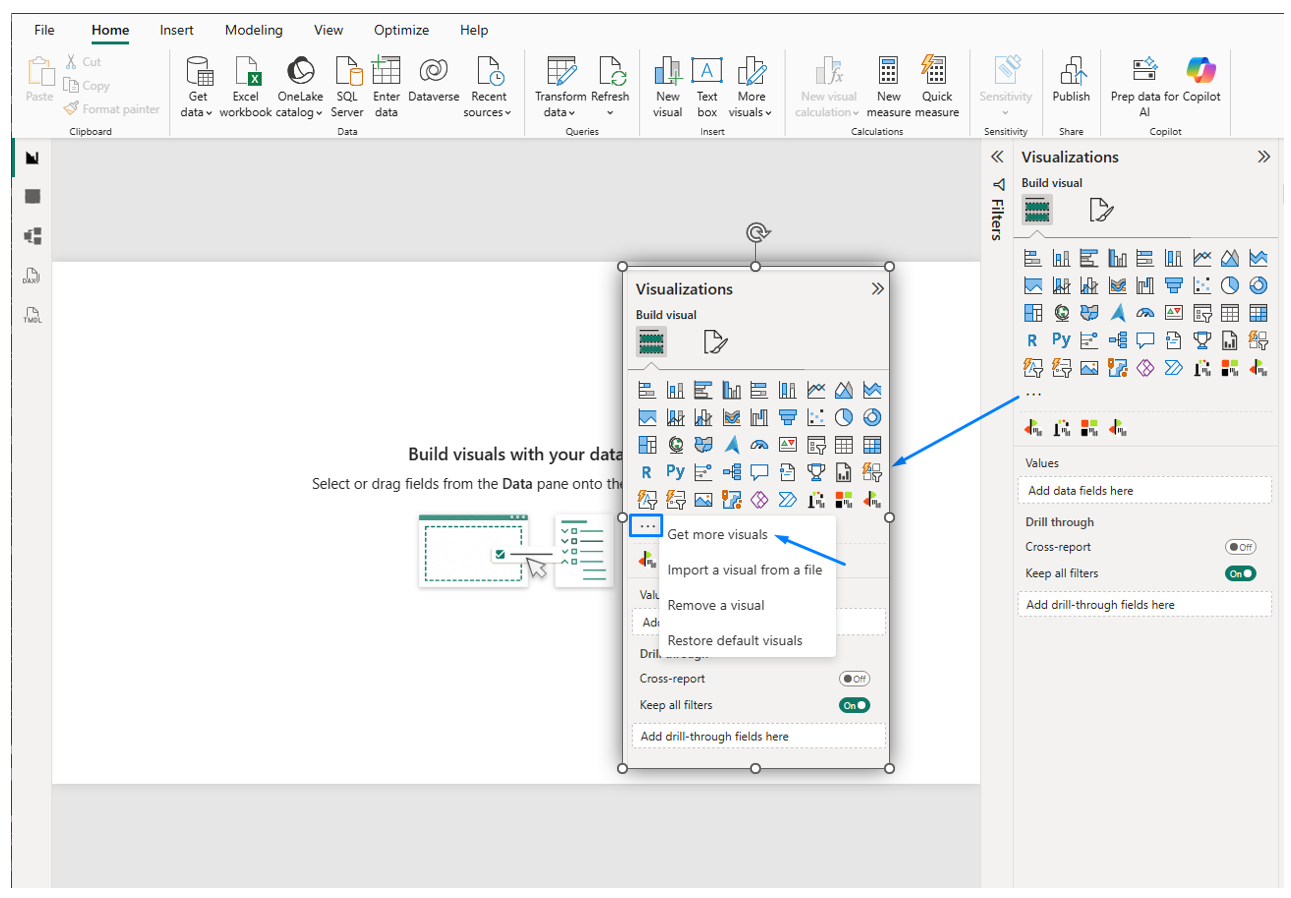
The first step is to download Zebra BI add-ins from the official channel – The Appsource Store. When you open any report in Power BI Desktop you will see the Visualizations pane on the right side. Below all the visuals you will notice a three-dot icon (…) which will lead to the Appsource Store.
Click on the icon and select Get more Visuals.
An additional window will open, where you type in the “zebra” keyword in the search bar on the right. Currently, three Zebra BI visuals are available.
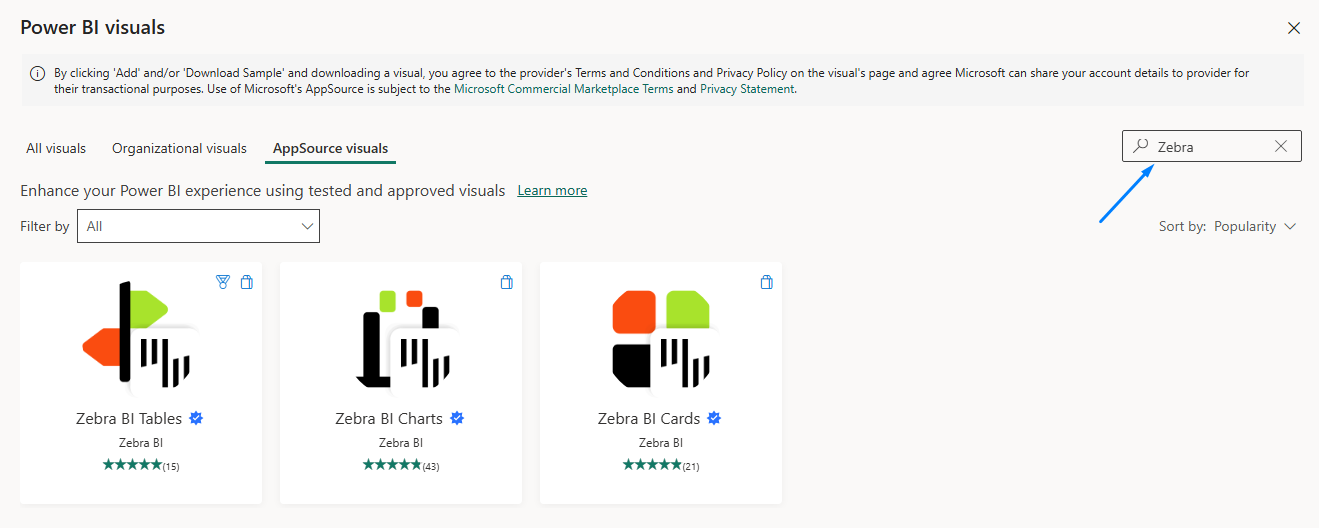
Selecting one of the visuals will allow you to download the visual and a sample file to get acquainted with our visuals.

As you already know, you can download and use Zebra BI visuals for free but with limited access. If you don’t have the license key yet, you cansign up for a free trial or simply purchase your license on our website. There are also various templates you can explore which include unlocked visuals so you can experience Zebra BI to its full potential.
Entering the license key
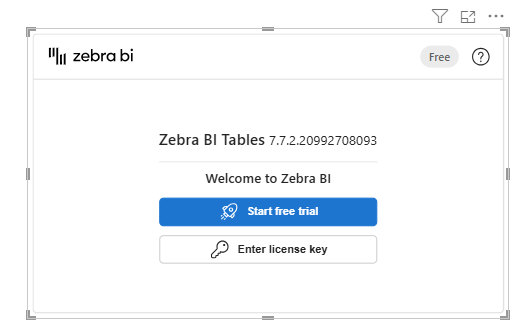
Once the visuals are downloaded from the Appsource Store, they will be visible in the Visualizations pane below the other visuals. When selecting a Zebra BI visual this is the landing page you will get.
The visual indicates that it doesn’t have a license key stored (“Free”), so you need to click on the “Enter license key” button.
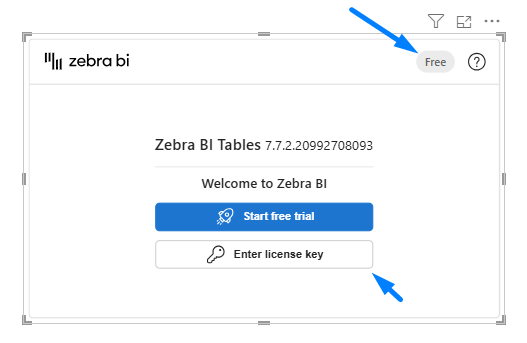
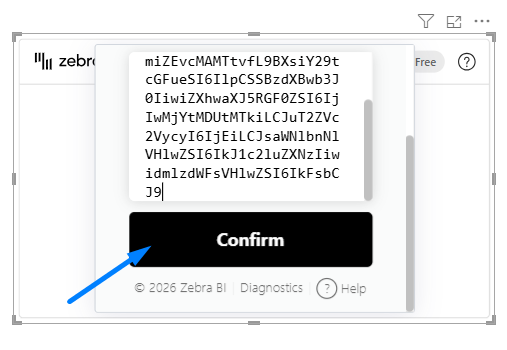
Paste the license key you received after purchasing the package or subscribing for a free trial into the activation window and press “Confirm“
Upon that you will be informed about the activation and the expiration date of your license.

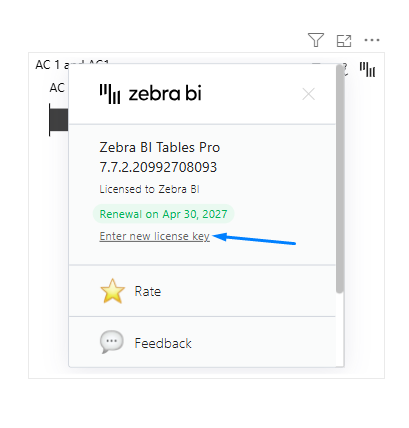
You can replace the existing license key at any point by clicking on the Zebra BI icon at the top right corner and clicking on “Enter new license key”.
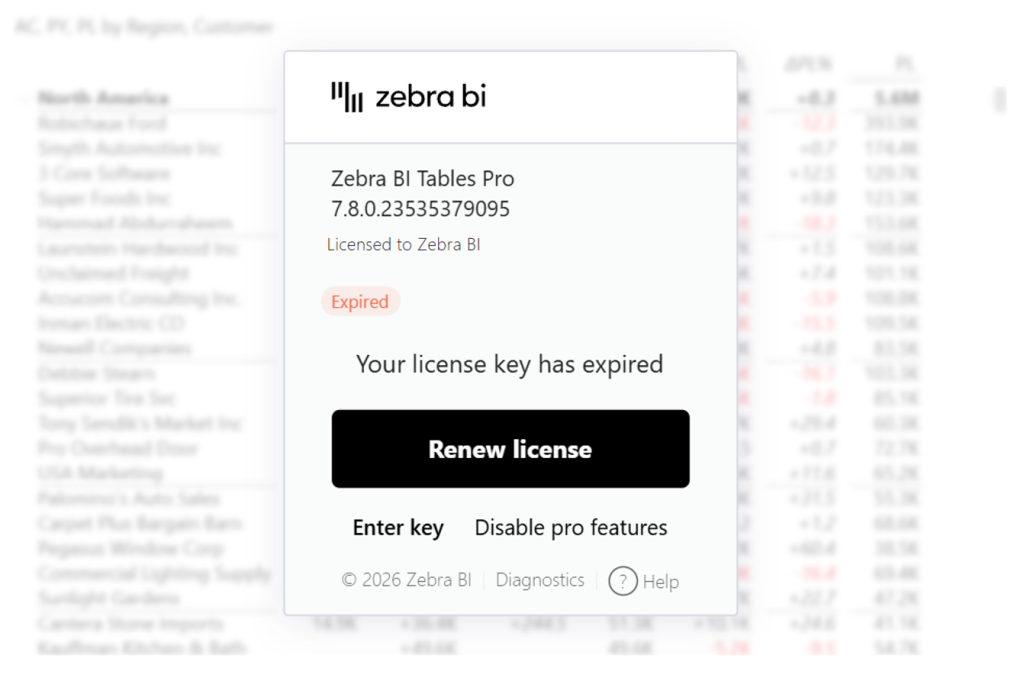
When your license key validation expires, reports published online will continue to function normally until they are edited, allowing you to update license keys gradually. However, reports that are actively being edited in Power BI Desktop will be locked immediately, so updating the license key is required to continue working.
That’s it! You’re ready to start building your reports and dashboards with Zebra BI visuals. Learn more about what type of tables, charts, and cards you can use to create reports that are actionable and understandable.